 |
   These won't be the most perfect stars you've ever made, but that is what makes this an enjoyable project. Whether scrappy or planned, this is a quick, easy and fun project. These stars can be made in any size you desire. If you need little stars, or big stars, you can adapt the pattern to fit your needs. Basically you are making a Sawtooth Star, but forgetting all the rules of piecing. What ever happens happens, and it will be a fun project when you are done! You can use all the same background if you'd prefer, but I like keeping it totally scrappy, and use all different lights for my backgrounds. |
You can make your crooked stars any size you want to make them. Basically this is a nine patch star, four corners, your center square and four crooked flying geese. You can make it any size you want to fit the project you are making. The graph below shows you how to make four traditional size crooked stars.

(My directions will be for a 5 1/2 inch finished block, 6 unfinished, so remember that as you are sewing along. Odd size I know, but I was sewing a sample and not really paying attention to size. That measurement fit my ruler best, so I used it. And besides, it made a cute wall hanging! )
If you want to make a 12 1/2 inch block, below are the cutting requirements.
For each block you will need to cut four 3 3/4 by 6 1/2 inch rectangles and four 4 inch squares of background pieces, white, white-on-white or very lights colors.
For each point you need one 4 inch square, so you need a total of eight, either all the same or all different.
And you need a 6 1/2 inch square for your center. (Or you can make that a four patch, or even a nine patch, just which ever strikes your fancy as long as it equals 6 1/2 inches when you finish making it.)
| First, if you decided to make something other than a solid block for your center square, make that now. Remember, whatever you make you want it to end the measurement of the center square on the chart for the size block you are making. I made a scrappy four patch block with four 2 1/2 inch squares. Then I trimmed those back to 3 1/2 inches, but did it crookedly to add some interest. |  |
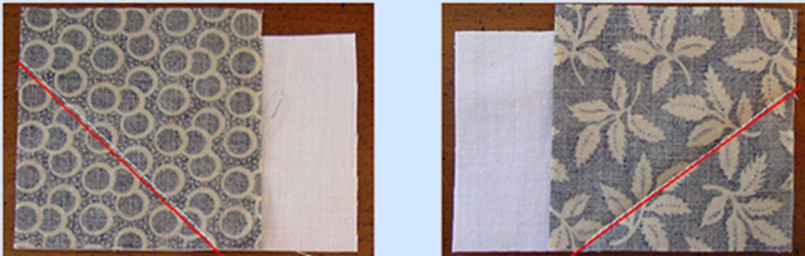
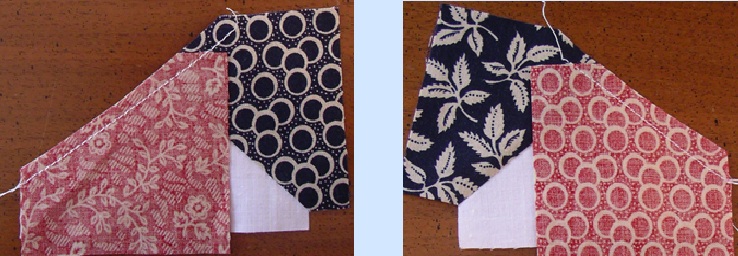
Now we can move on to the flying geese units, but believe me these will be the easiest flying geese you have ever made. Simply lay one of your 2 1/2 inch squares on the corner of a rectangle unit, and sew a line diagonally across any way you please. If you go all the way to the top of the square, or you won't have any points at all. Remember that square is bigger than your rectangle. (If you don't want to lose any of your points, that is ok! I have to remember to lose points on purpose.) The red line is just showing you my sewing line.
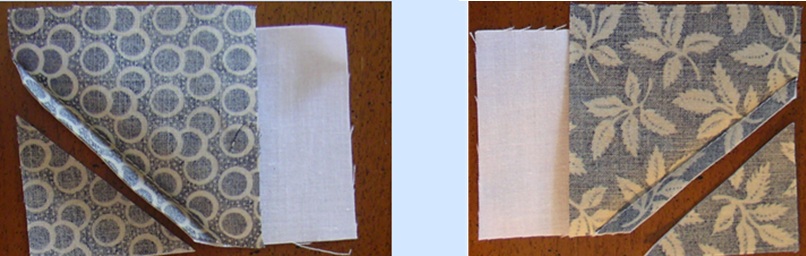
Don't forget to trim back your excess fabrics, leaving at least a 1/4 inch seam allowance. I just use my scissors to do this, but if you really have to, you may use your rotary cutter and ruler. I forgot to trim when I did these, as you can tell by the pressing lines. However, I did remember, which is important!
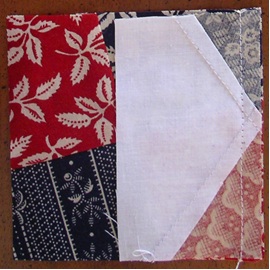
Press carefully towards the squares. And now add the second square to your rectangle. Remember to angle your sewing lines a little different each time, to give your point a variety of height and width.
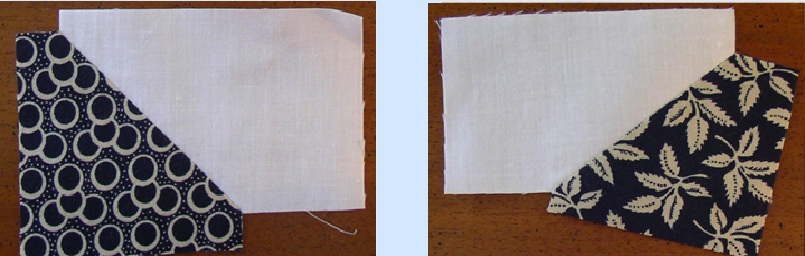
Trim off the excess, leaving at least a 1/4 inch seam allowance. Press again to the square, and then trim these back to the 2 by 3 1/2 inch rectangles you started with.

 |
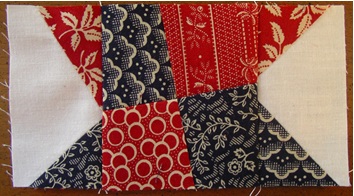
Add one rectangle to the side of your center block, either the 3 1/2 inch square or a four patch like I have here. Press carefully so the seam allowance goes towards the center square. Guess what comes next! If you said add the other rectangle unit, you were correct! Again, press so the seam allowance goes towards the center square. |
 |
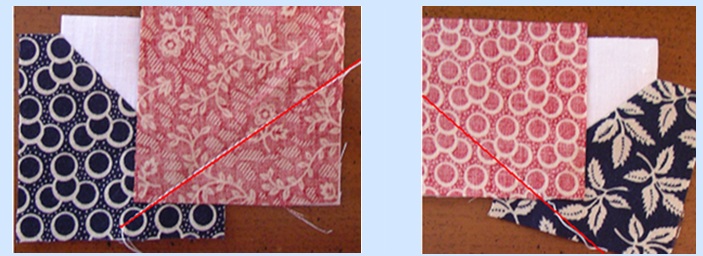
What comes next is probably totally different than the way you've done things in the past… Not to worry, it will work out in the end. We are now going to attach the 2 1/2 inch squares to the end of the remaining rectangles. Yes, I know they are too big, but we want them that way, you'll see why in a little bit. Just be sure that the bottom edges and sides meet.
Aren't they funny looking!
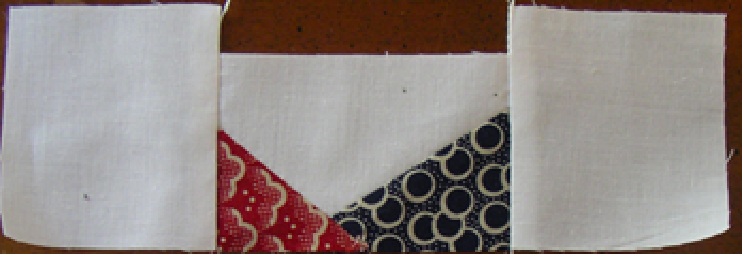
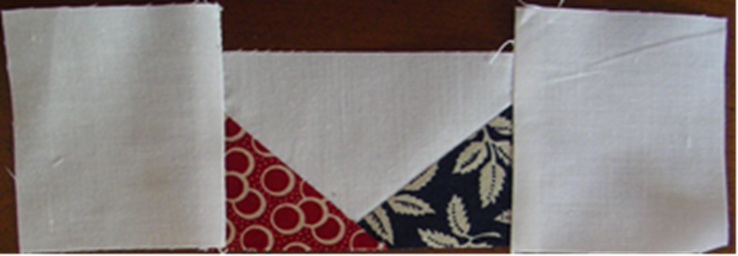
Now we are going to attach these funny looking rectangles to either side of the center unit. Again, funny looking, but just wait to see what's coming up next.
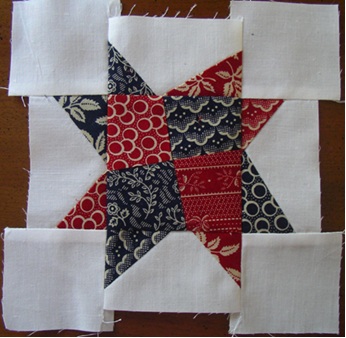

Lay that ruler down CROOKEDLY on your crooked stars and trim away all that excess fabric. You can see that my sample just fits the ruler, and as I said at the beginning, I knew that when I started. (You don't think this is the first star I made do you? My first star actually had much larger corners that wasted a lot of fabric, so I cut back the size of that square. Did I waste it, no it's in that little wall hanging, but don't ask me which one it is, I forget.)
I hope you can have fun with Crooked Stars and that you will share photos of your quilts with me, please and thanks.
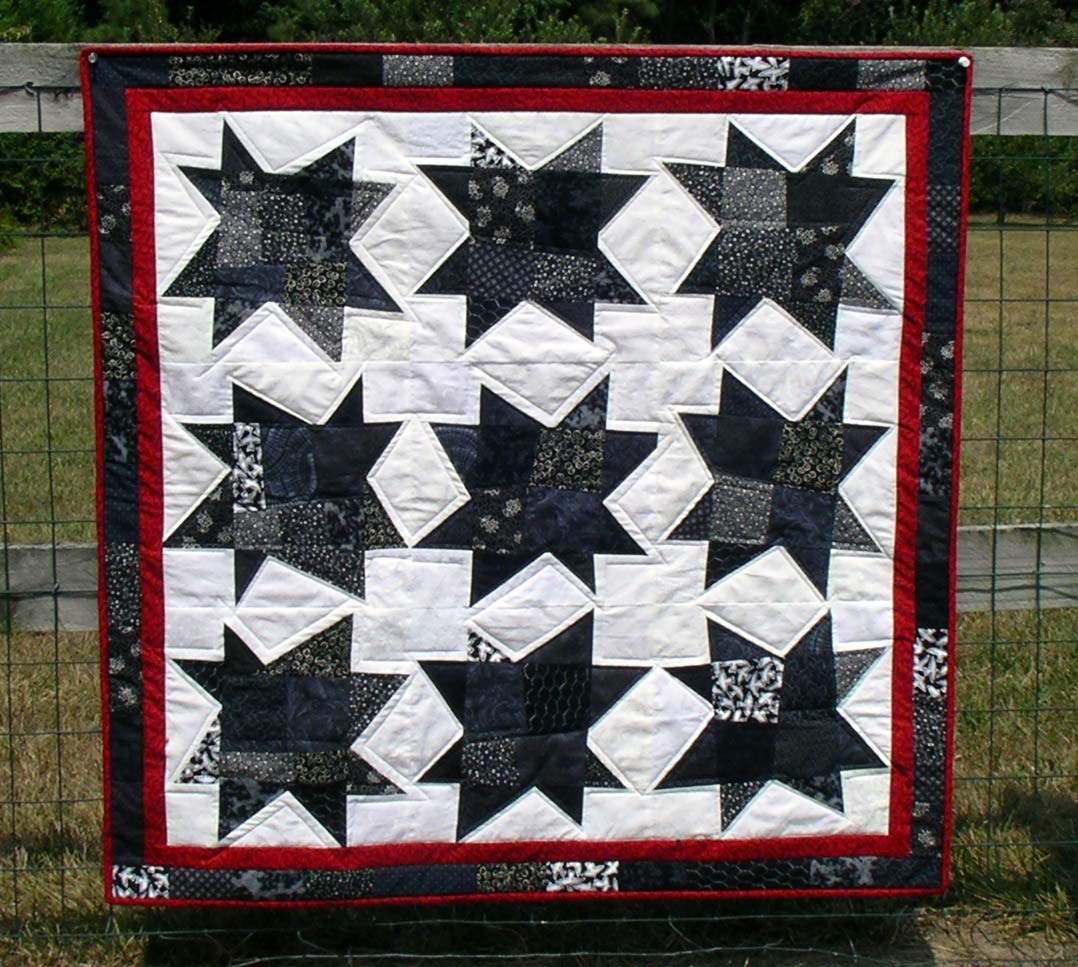 My first Crooked Stars, made from miscuts from another quilt. |
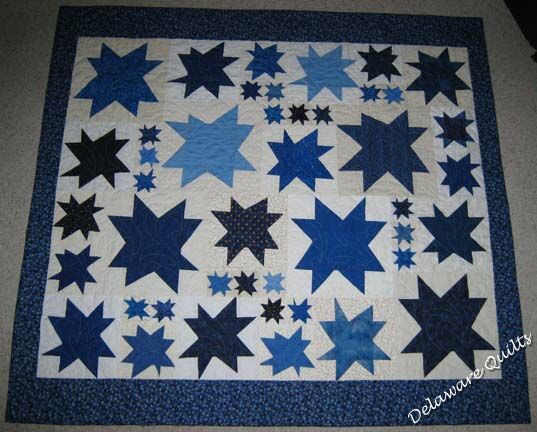 Crooked Blue Stars was made up as I found scraps of blue, I'd make a crooked star and stick it in a box. When the box got full, I made a quilt. |
without the owner's permission. This includes the patterns as well as any graphics and/or instructions that are associated with a pattern.
The content on these pages, including text and images are the sole property of the Delaware Quilts and may not be used in any manner without consent. All Rights Reserved.
Posted , 2025
|Home| Quilts| Email|