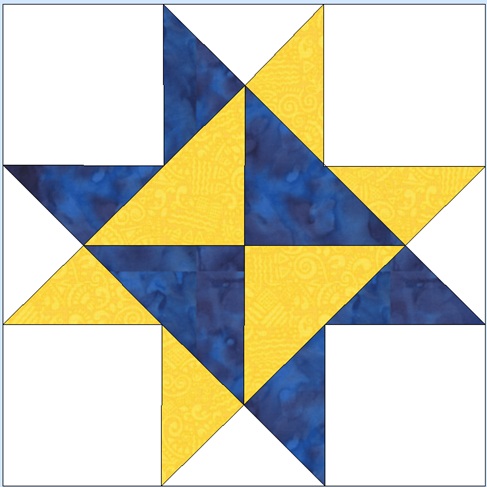
  Right Hand of Friendship I am adding this block to my celection because of its name. Delaware Quilts started because of all the internet friends who wanted the opportunity to meet in person. Many friendships started because of the annual retreats we had, and even though the retreats are finished, those friendships continue. I found this block while browsing through Barbara Brackman's Civil War Quilts blog. It looks like a complicated block, but it isn't. It is just a nine patch block that's put together a little bit differently. Don't be afraid to try it. Note: There is a Right Hand of Friendship in Block Base, however this is the version from the Civil War Quilts. I liked this one better, so I am sharing this one. |
 |
 |
For the Right Hand of Friendship you will need: Four 4 1/2 squares and one 5 inch square of your background fabric (white) One 5 inch square and one 4 3/4 inch square of your blue fabric One 5 inch square and one 4 3/4 inch square of your yellow fabric Mark then cut your all of your 5 inch squares into four quarters diagonally. Mark then cut your 4 3/4 inch square in half diagonally. |
IMPORTANT Note: you are dealing with bias edges on all of your cut squares. Bias has more stretch than the straight grain of fabric. When you cut your squares, you exposed that stretchy part in the middle, so you should handle those pieces carefully.
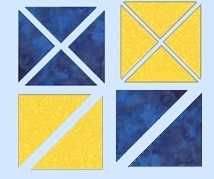
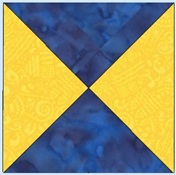
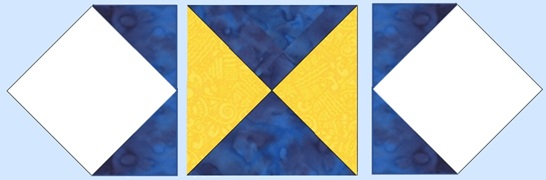
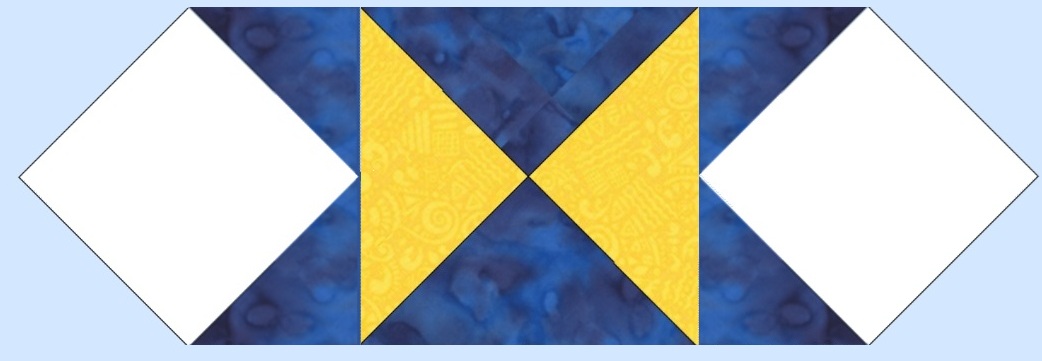
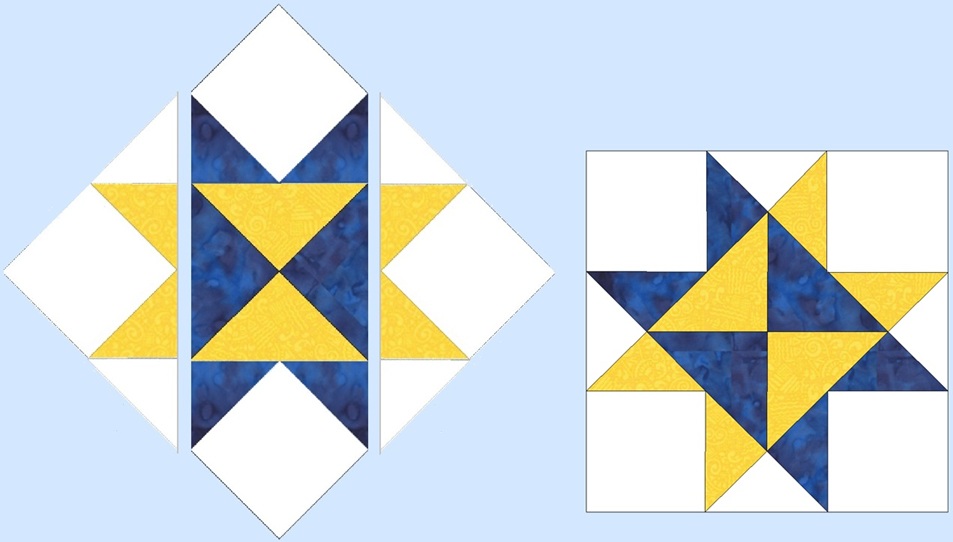
We will start with the middle section of the block. Take two different colors of the 4 3/4 inch square you cut and put them together like this. Do the same with the remaining two except you want the colors to switch positions. Then put them together into a square. This square should measure 6 inches.
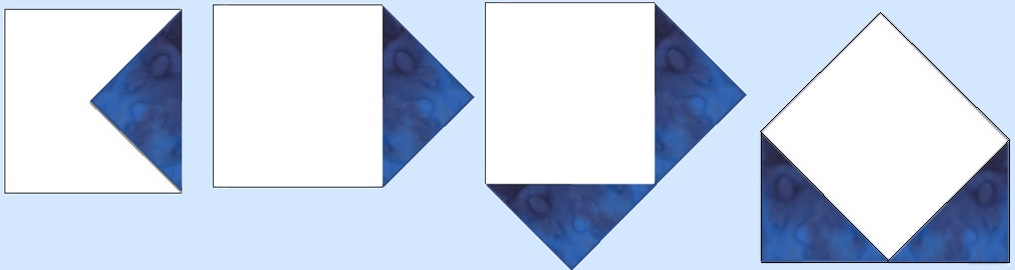
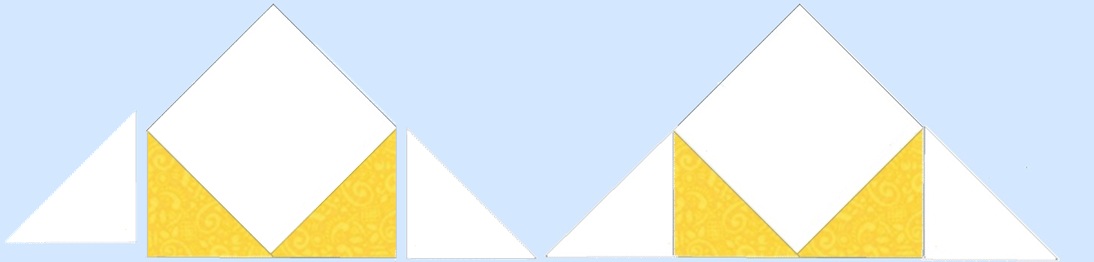
Next take one of the white corner squares and two small blue triangles and put them together as shown here. Remember you are working with bias so sew and press carefully. Repeat with an other corner square and two small blue triangles.
Finishing the center row, attach those corner squares to yellow side of that center square. Be sure that you attach it to the yellow side of the center square.
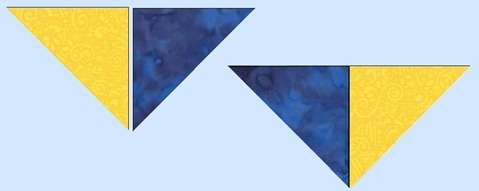
Almost done, just the last two sides to finish. Attach two yellow triangles to the sides of a corner square as shown, add a second yellow triangle. Repeat with the last corner square and two yellow triangles.
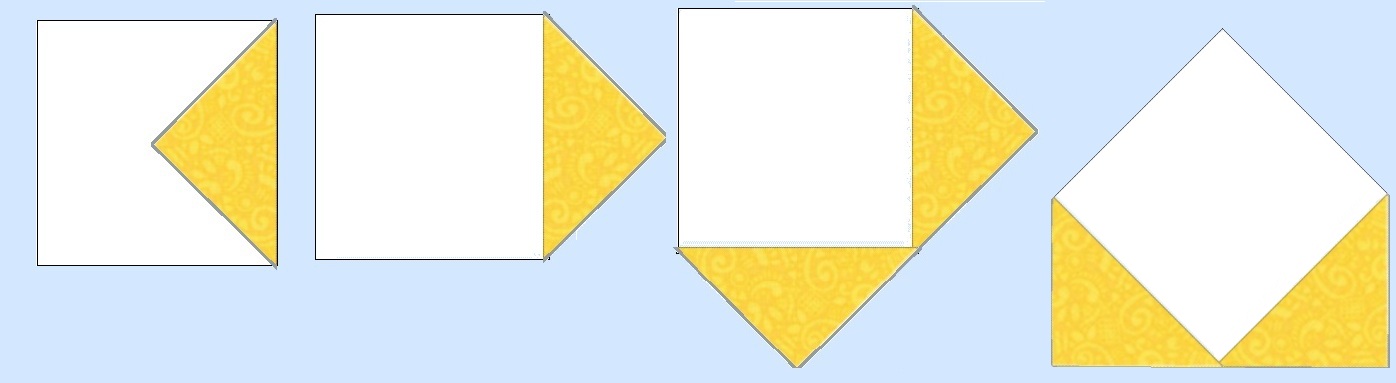
Then add white triangles to the yellow triangles as shown.
And finally put it all together. You finished block should measure 12 1/2 inches. Here's my sample block which I made to test the pattern. I was a lot easier than even I thought it would be.
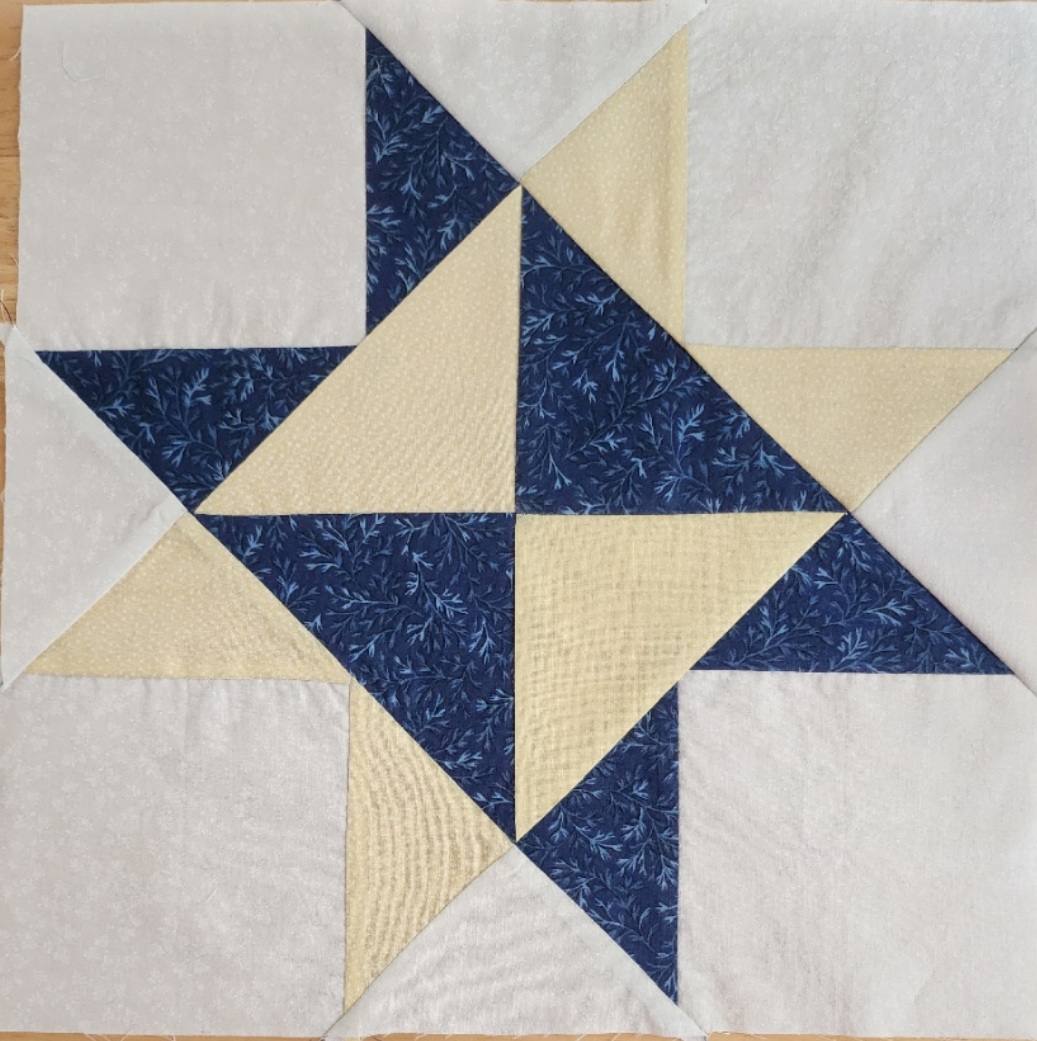 My block
 without the owner's permission. This includes the patterns as well as any graphics and/or instructions that are associated with a pattern.
The content on these pages, including text and images are the sole property of the Delaware Quilts and may not be used in any manner without consent. All Rights Reserved.
Posted November 1, 2025
|Home| Quilts| Email|