

 |
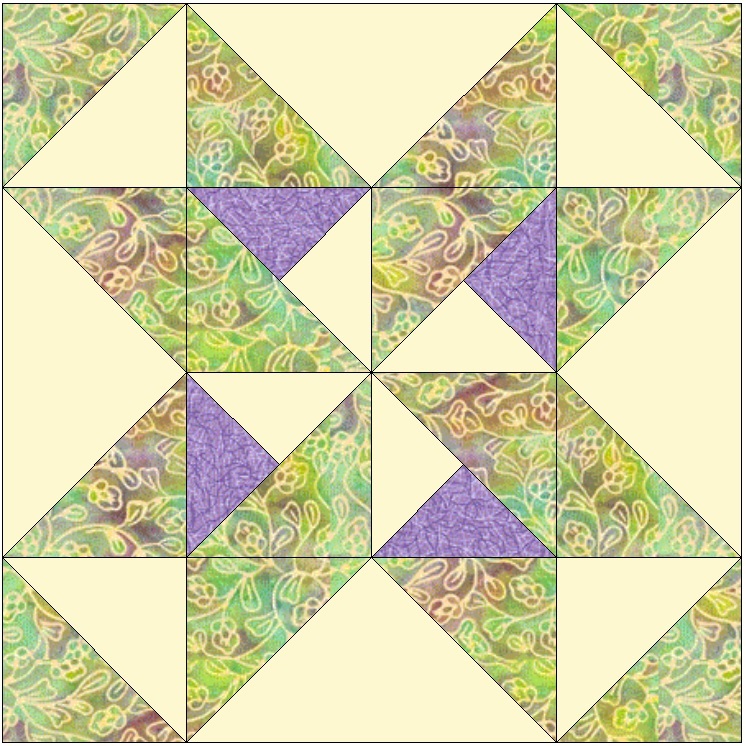
This block might look complicated, but it isn't really. Just measure each unit as you go along, and it will come together perfectly for you. To make a 12 inch finished Star and Pinwheels block you need: From your background cut two 3 7/8 inch squares, four 3 1/2 by 6 1/2 inch rectangles and one 4 1/4 inch square. From your star color (my green) cut four 3 7/8 inch squares and eight 3 1/2 inch squares From the accent color (my purple) cut one 4 1/4 inch square. (The diagrams are all shown on the right side, and are not to scale.) |
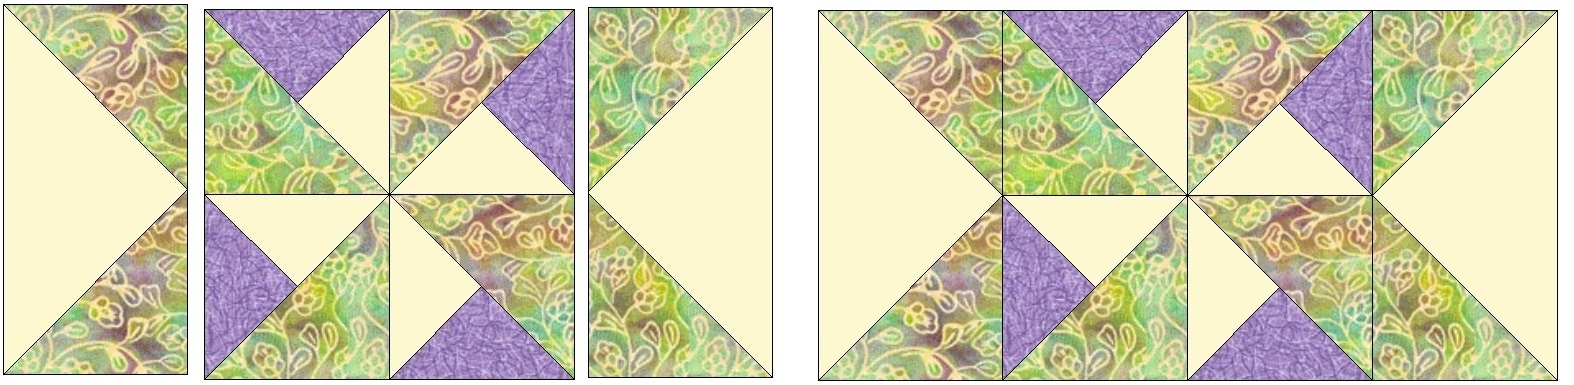
Let's start in the center. Cut your 4 1/4 inch background square in quarters diagonally. Do the same with the 4 1/4 inch accent color square. Also cut two 3 7/8 inch squares in half diagonally.

| Next you want to carefully sew a background and accent together as shown with a 1/4 inch seam. (Hint, sew from the flat edge of the triangle.) Be sure to sew them as shown here, colors in this order. Handle these carefully as they have bias edges. Press gently towards the darker color. Add the star triangle, and press again, carefully and towards the star triangle. These units should measure 3 1/2 inches when you are finished. | 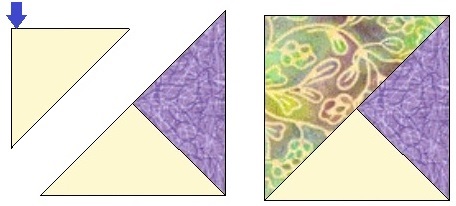 |
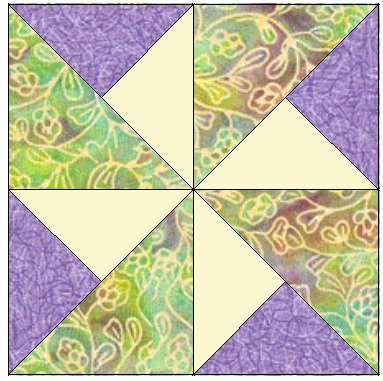 |
And now you can put together the center square. Pay close attention to the direction your units are going, or you will lose your pinwheels. The center square should measure 6 1/2 inches. |
The next unit to work on will be the four corner squares, which I call diagonal half squares. You need to use background and star color 3 7/8 inch squares to make diagonal half squares, place them right sides together. Draw a line corner to corner, (diagonally) through the wrong side of the background, this is the cutting line. If you have a quarter-inch foot, sew on either side of that line, then cut on that line. (If you do not have a quarter-inch foot, just add two more lines, 1/4 inch on either side of the first line.) Press towards the star fabric. Your diagonal half squares should be 3 1/2 inches. Repeat to make a total of four diagonal half squares.


| One more unit to do, the flying geese that make up the sides of the center square. These are easy also. Take a background rectangle and place a star 3 1/2 inch square on one side. You could mark the square on the wrong side if you'd like, or just pinch it like I do for smaller squares. | 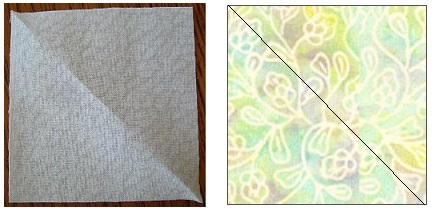 |
 |
Sew on your line, and then cut off the excess, leaving a 1/4 inch seam allowance. |
Repeat the same steps for the other side of the rectangle, and your flying geese unit is finished.
It should be 6 1/2 inches by 3 1/2 inches when finished and you need four of them.

All of the units are complete now, so it's time to put the block together.
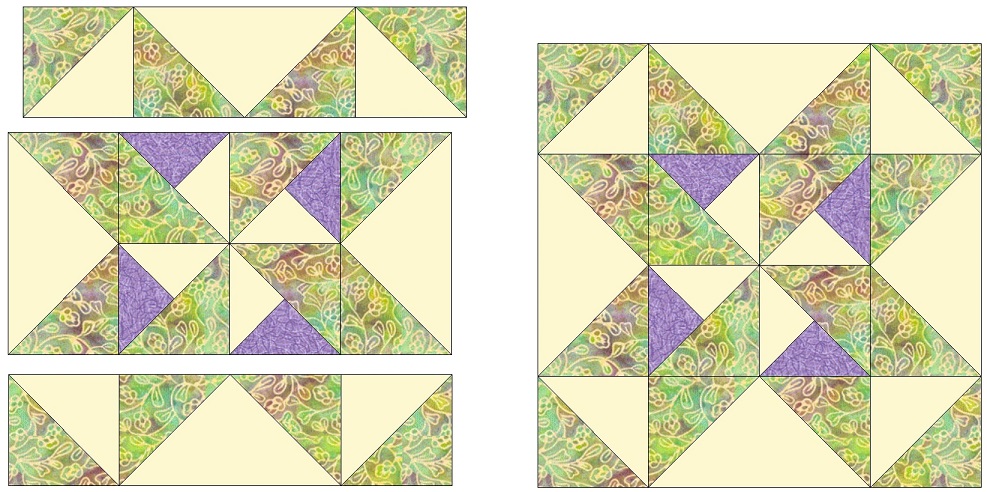
First put a diagonal half square on each side of two flying geese units as shown here. (Use just two flying geese.)

Next, put the two remaining flying geese units on either side of the center square.
Follow the diagram below to assemble your Star and Pinwheels. Your block should measure 12 1/2 inches when you are finished making it.
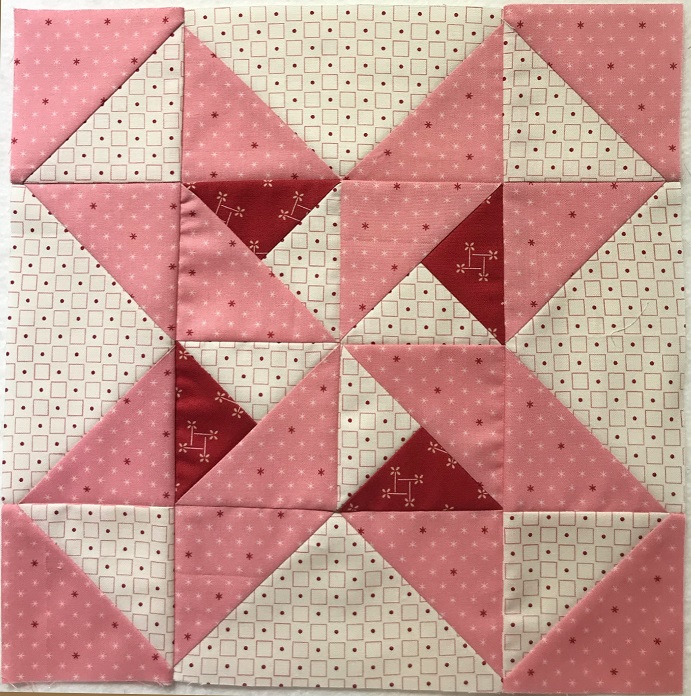
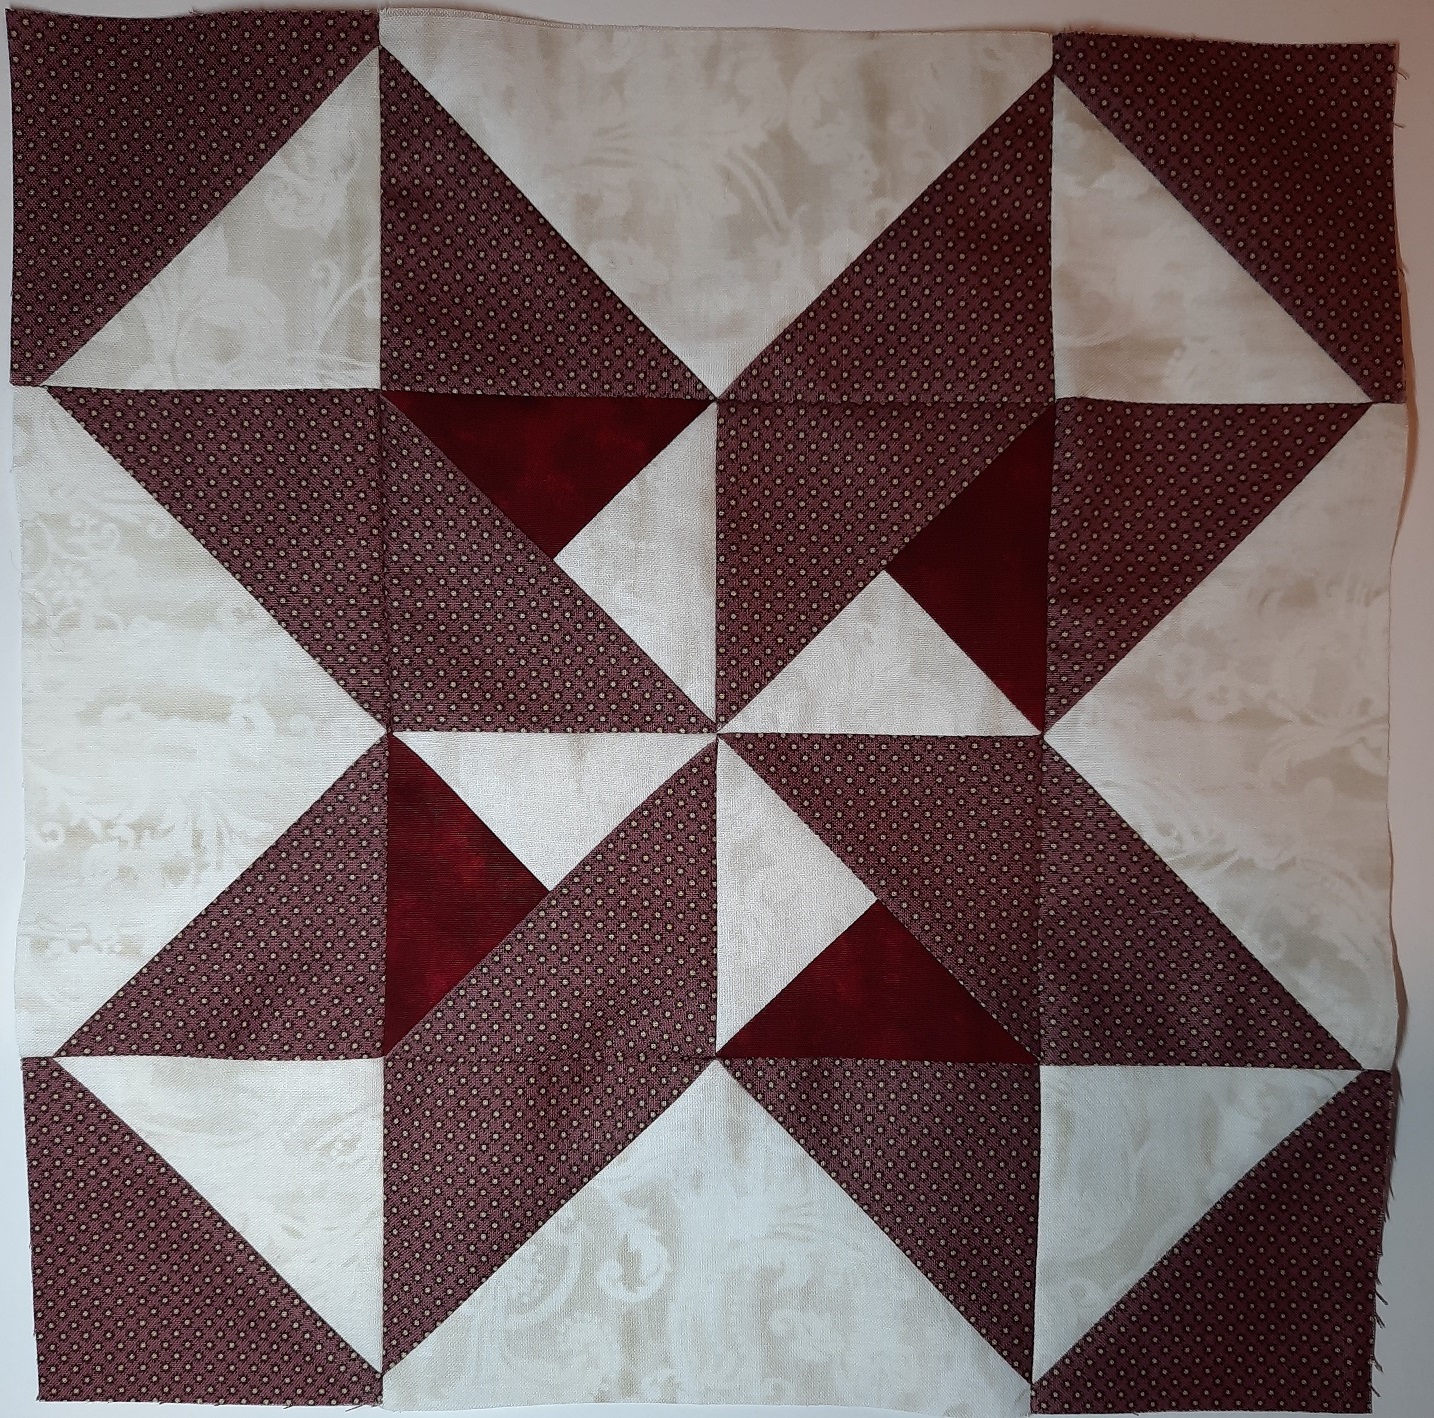
Here are three Star and Pinwheel blocks made by friends.

The content on these pages, including text and images are the sole property of the Delaware Quilts and may not be used or reproduced in any manner without consent. All Rights Reserved.
Posted July 30, 2022
|Home| Quilts| Blocks| Email|