

String Blocks
(Find more String Blocks here)
 | This is a pattern which I've used many times, and taught quite often. I show my string quilts with my Scrappy Happy Trunk show,
and there is always someone who wants to know how it was made. I've decided to start the new year by sharing this project with the WWW, or
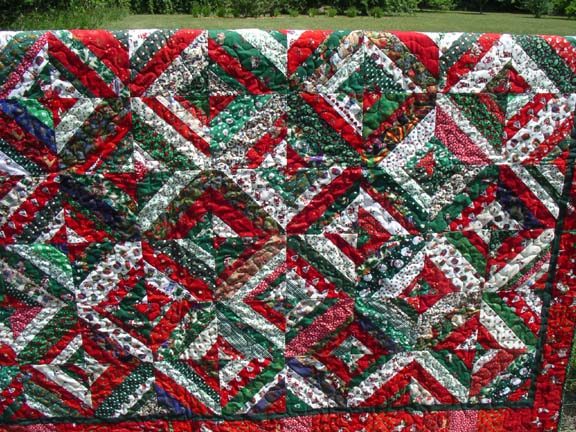
anyone who is interested in my way of making string blocks. I like to think of this pattern as one the early settlers would have made, but honestly I can't find any documentation on this. However I can say the very first string quilt I ever saw in person was an antique, and it was made entirely from old clothing. Later I saw a 1930s scrappy string quilt, and of course I had to make one for myself. I came home to find a pile of left over strips, none which were 30s fabrics, and decided to make my first string quilt to use them up. I believe I've made seven or eight string quilts since then, and I still don't have one using my 30s reproduction fabrics. There are many patterns on the internet for strings quilts, and I've tried several of them myself. However after trial and error, I decided I like this technique the best. And so now I'll share my technique with you. This is my Christmas Strings, now owned by Jamee Smith |
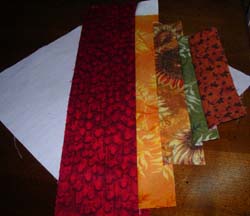
For the foundation you want to use a lightweight 100% cotton, just like your quilting fabric should be. However, have you ever bought a piece of fabric and when you got it home and washed it, found it was a little thinner than you were comfortable with... now you can use it in a quilt. If you don't have any such fabric in your stash and you have to go buy new for the foundation, get a lightweight 100% cotton muslin. Be sure to pre-wash it to make sure it is fully shrunk. Cut your foundation fabric into 7 inch squares, as many squares as you want for which ever project you want to make with these blocks.
I will be using muslin for my foundation.
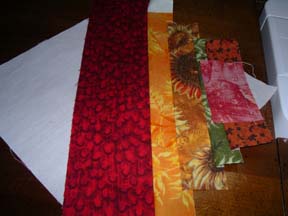
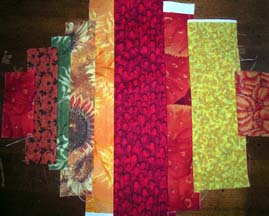
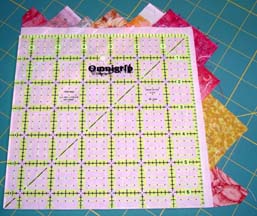
Gather all your scraps that are strips and strip types. You know, your left over bindings, the little bit that was left over when you cut strips, the extra that was left over when you squared, stuff like that.
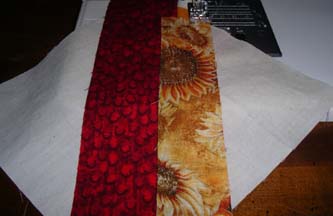
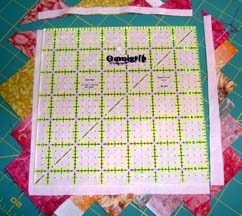
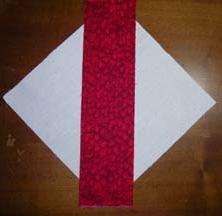 | Set the foundation on point, and pick a strip from your pile that will cover the center corner to corner. Place your strip on the foundation with the right side up, facing you, from the top corner to the bottom corner. |
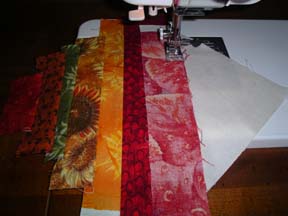
| Now pick a second scrap from your pile, one that will fit from where the foundation is peeking out top to bottom. Place that piece right side down on the first piece, and sew with a 1/4 inch seam allowance. | 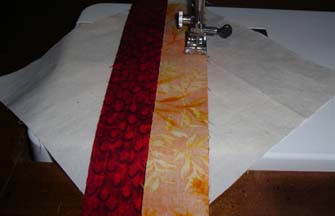 |
| Flip the new piece over, and finger press. | 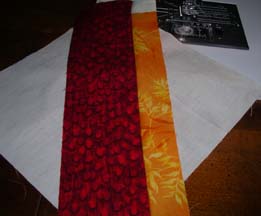 |
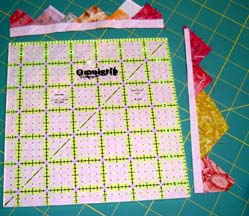
 | Chose another strip and add that one on, just like the second one. |
| Flip, finger press, and add another strip as needed. | 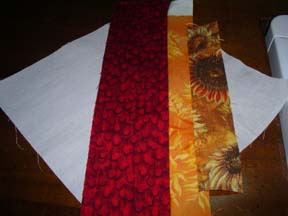 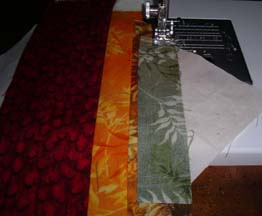 |
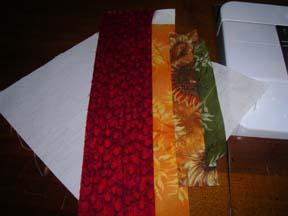
(The white bits you see on my block are selvedges, which will be trimmed off.)
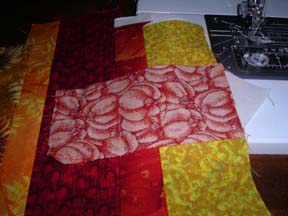
| Then I recommend you take your square to the ironing board, and give it a good pressing. | 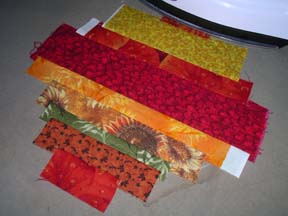 |
| Finally, we square the block back to a 6 1/2 inch square. | 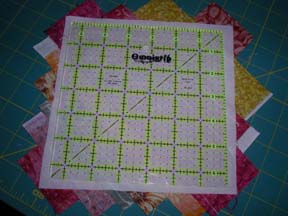 |
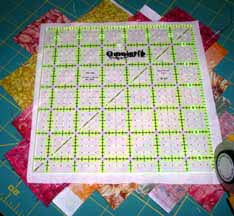
| and square it to a 6 1/2 inch square. | 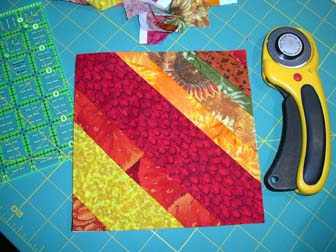 |
What you can do with these string squares is almost endless. If you put four together, you will have a 12 1/2 unfinished block.
Sizes...
You can make your string blocks any size you wish simply by starting out with a larger or smaller foundation square. I've shown you a 6 1/2 inch string square. You could just as easily start with a 10 inch foundation square and cut them back to 9 1/2 inches, or a 4 inch square and cut them back to 3 1/12 inches.
Here is an idea that was suggested to me by a Mysteries For Relay group member. She said she makes string blocks larger and then cuts them into 4 smaller blocks. That would give your blocks a more controlled look, and coordinated too! Thanks Mel, I like that idea!
Settings...
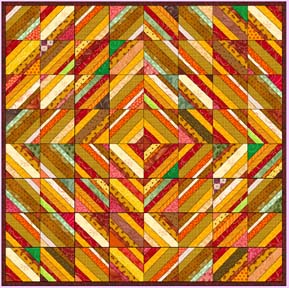
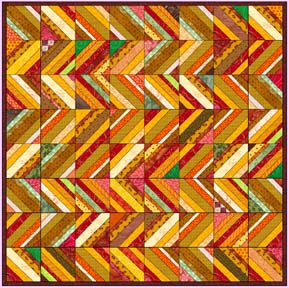
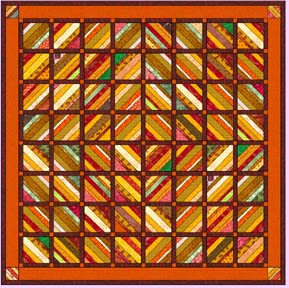
The settings for string blocks are endless, and deciding which one to use may be the hardest part of this project. As you can see by my demo block my newest strings are fall colors, and so far I have over 80 blocks. Because I don't know yet how I intend to set them, I am still sewing. Here are a few EQ diagrams I've made to help me decide how to set my fall strings.... I'll let you know which one I pick.
These quilts are 9 blocks by 9 blocks.
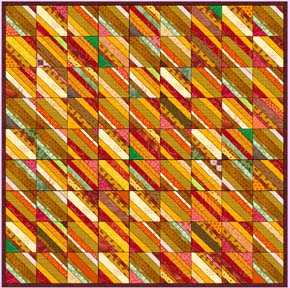 The first quilt is set straight, remember our blocks are made diagonally. | 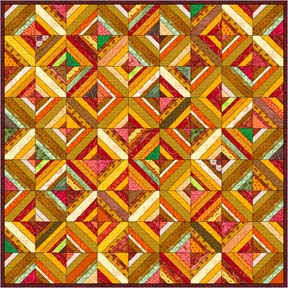 The second is in an Xs and Os pattern. | 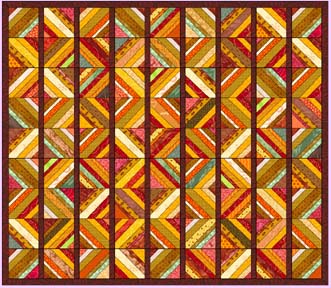 And by adding just vertical sashing to the Xs and Os you get a whole new quilt. |
These quilts are 8 by 8, and set in the barn raising and zig zag pattern. By adding sashing and borders, the barn raising has a totally different look.
Finishing...
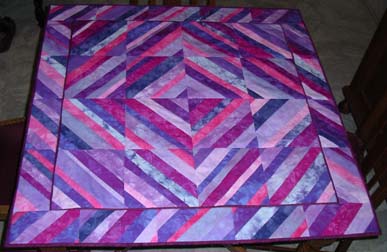 | If you don't want a heavy quilt, you can leave out the batting. I enjoy making table toppers with string blocks, and do not put any batting in my finished toppers. This would also work for a summer quilt, one lighter weight but still warm enough to keep of the AC chill. Simply put a backing on and quilt as desired, bind and you are finished.
My Purple Table Strings is made without batting. The trim is a one inch strip of contrasting fabric folded wrong sides together, and sewn in with the outer border, which is just blocks cut in half. |
The content on these pages, including text and images are the sole property of the Delaware Quilts and may not be used or reproduced in any manner without consent. All Rights Reserved.
Updated June 14, 2020
|Home| Quilts| Blocks| Retreat| Email|